The thesis is one of the most important projects in an academic career, but with a little help, it can be completed easily. The following article explains how to print and bind your thesis correctly.
What to keep in mind while printing a thesis?
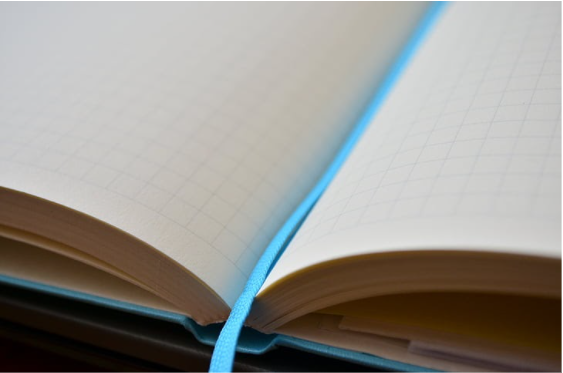
Paper type
When printing a thesis two things are important: the page number and the layout. For your advisor to be able to follow the flow of your thoughts, you need to start from a logical point in your introduction and move on towards more detailed information. Similarly, if you have used oversized margins, they should not jump from one page to the next, but follow a logical sequence.
If you are using A4 paper, every 2 pages will result in 1 printed page. In other words, if your thesis is 60 pages long, it will be printed as 30 A4 pages. By printing your thesis on A4 paper, you reduce the number of times that you will have to cut and glue your sheets later on, and therefore reduce the risk of producing pages with unclosed folds.
The text should be printed in Letter size. This means that if your A4 paper is folded once (producing 2 A5 pages), both A5 pages will result as one printed page in Letter size. This may be of importance if you are using larger margins.
Margins
The margins in your thesis should be 1 inch (2.5 cm) on the left and at least 1.27 inches (3.2 cm) on the right. If your thesis is bound by a commercial company, these margins will provide enough space for binding without splitting the paper. If you wish to save some money and bind your thesis yourself, these measurements should be sufficient for an A4 sheet of 150 pages. Pages consisting of more than 150 pages may require larger margins.
First impressions are important, so make sure that the first page is either blank or consists of a title printed in large letters (1 inch high letters are usually sufficient). If you do not want to waste the first page, consider printing your name and student number underneath the title.
Please note that adding lines or boxes around the text is considered poor taste and should be avoided.
Type and size of the font
As a general rule: The smaller your thesis, the larger the letters. It will be hard for your advisor to read “Times New Roman” printed in 6 pt.; he or she will be much happier with 16 pt.
Another important factor is the width of characters, especially “i” and “m”. Avoid printing them very thin so that they become almost indistinguishable (they should not print like lines but like small circles).
You may wish to print your thesis using the same font like the one you used for writing it. If this is what you would like to do, please keep in mind that there are hundreds of different fonts available. They differ not only in their appearance but also (and more importantly) concerning their suitability for printing.
Some fonts print well in all sizes, others look nice when printed small but become difficult to read when used for headings or titles. “Times New Roman”, “Arial” and “Courier New” are a few examples of fonts that look good in most sizes and circumstances.
Print your thesis using black ink only. Colored ink may become difficult to read, especially if you are using a printer that produces poor-quality printouts.
Spacing between lines
To help your advisor follow the development of your thesis, there must be always enough space between paragraphs. This means that the distance between two consecutive paragraphs should not be less than 1 inch (2.5 cm). For text that consists of complete sentences, a distance of 2-3 lines is recommended.
For headings and major divisions in your thesis, you should use a larger distance between paragraphs (3-4 lines or more).
It is important to note that the spacing before and after a heading counts as part of the heading. So if you use single line spacing for your thesis, you could set the distance after a heading to 0.5 inches (1 cm) and the distance before another heading to 1.5-2 inches (3-4 cm).
Many word processors include features that allow you to adjust the space between letters to create superscripts and subscripts. Please avoid using these features, as it is very difficult to judge their results when printed.
Length of lines and pages
In general, you should set the length of a line in your thesis to 65 characters. This will provide enough space for most letters without splitting sentences or words. It is not important whether this number is reached exactly. Usually, a length of 60-70 characters is sufficient to make your thesis easily readable.
Please note that the “word” or “character” count does not provide an accurate estimate of the number of pages required for printing your thesis. The reason for this is that many words and symbols (and even whole sentences) can be abbreviated to avoid wasting paper.
Although your thesis will be read on a computer screen, you should still take care not to make it unnecessarily complicated. Remember that the pages of your thesis are printed using laser printers or photocopiers that have limited resolution (currently 600 dpi).
Each page of your document can contain approximately 18-20 min of text. This means that if you set the font size to 6 pt., each page can hold 246 lines (at 65 characters per line) or 352 lines (at 55 characters per line).
You should also avoid making your pages look like “wallpaper” by filling them with too many patterns and images. Your advisor is unlikely to be impressed if the text of your pages cannot be read or is indistinguishable from the background.
Type size and margins
The type size that you should use for printing a thesis depends on how much text you can fit on each page. If this amount is less than 5-7 pages, then you should set the original type size to 8 pt. If you can fit 8-10 pages on one page of the thesis, then you should reduce the type size to 7 pt. For a printout that includes at least 10 pages, use a font size of 6 pt.
Since margin requirements for binding a thesis are very strict, you must limit them as much as possible. The margins should be at least 1 inch (2.5 cm) on the left and right sides of each page, but no more than 2 inches (5 cm) on all four sides.
Margins for headings
If you want to establish a certain distance between text lines, your headers and footers can be used as “markers” for this distance. For headers, the distance before each line should be at least 0.5 inches (1 cm). The distance after each line can be half of that (0.25 inches or 5 mm).
If you want to set a large distance between your title and your first-page number, then you can use the header. Just use the “center” alignment for your title and insert a diamond or other figure where you want your page numbers to appear.
If you do not have much space available for text on a page, try reducing the distance between lines in your headers and footers. This may help to make them more readable.
Lines and paragraph indentation
The only allowance that your thesis must include to be considered “typical” is two line spaces after each paragraph. Your supervisor is unlikely to object if you do not use more space between lines. However, this means that you will have to increase the distance before or after headings to make them stand out more.
If you decide to use only one line space after each paragraph, your thesis will not be considered “typical”, but it is unlikely that your supervisor will ask you to change this.
Additionally, if you want some additional space at the beginning of each paragraph (for example, as a marker for quotations), then you can add half of a line space (equivalent to approximately 5 pt.)
Margins and spacing for quotations
If you are using a computer to type out long passages of text, then you should indent each paragraph by at least 0.5 inches (1 cm). If you are writing your thesis on a typewriter or in longhand, then the indentation for each new paragraph should be approximately the same as that for the corresponding text in your main text.
If you are quoting a passage of text, then you should keep it inside quotation marks and use single spaces between all words. Furthermore, your supervisor expects punctuation within quotations to follow American English rules.
Footnotes and Endnotes
Footnotes are always placed at the bottom of each page, regardless of text size or margins. If you have a large number of footnotes, then your supervisor may ask you to place them on separate pages.
You should also remember that all words in footnotes must be separated by spaces, even if they are short forms, abbreviations, numbers, or symbols. The only exception is the word “ibid” (which means “the work that was cited before”).
Also, make sure that your footnotes are all placed within the same vertical block, at least 0.5 inches (1 cm) from the bottom edge of each page. If you have a large number of footnotes that cannot fit into that space, then you should start a new page for them.
Your supervisor may ask you to label the top of your first page of footnotes as “Endnotes” instead. This is particularly common if your thesis has many footnotes (more than 15-20).
Captions and quotations in illustrations
If an illustration includes a caption of more than one line, then the first line should be flush with the left edge and all other lines should be indented. If you do not include more than one line in your captions, then do not indent them at all.
Similarly, if your quotation includes more than three lines of text, then it must begin on a separate line with a half-inch indentation. Quotations shorter than three lines should be flush with the left edge of their lines.
Bibliographic references
Your supervisor will ask you to list all bibliographical information in one single alphabetical list at the end of your thesis, before the appendices. The labels for this list are “Bibliography” and “References”.
When referring to another work in the main text, you should enter the author’s name between parentheses in the usual way. However, when citing more than one reference from a particular source (e.g., several pages of the same book), then you should include only the author’s last name followed by a comma. The first time that this author’s work is cited, you should also enter the year of publication between brackets.
If you are also using any websites as sources for some information, then you must include enough information to make it possible for your reader to find the website again (for example, if your supervisor knows or can easily find the website, then you should enter only the author’s last name or organization followed by “website”).
If your reader does not know this website, then you should include at least the title of the article in addition to its author.
Page numbers and running heads
You must always number every page of your thesis (except for some preliminary pages that your supervisor will tell you to leave unnumbered). When numbering pages, always include your name and the date of submission on each page.
In addition to page numbers, you should also include a running head with the title of your thesis. It is a good idea to use a smaller font size for this heading so that it does not dominate the first page of each chapter. If your supervisor prefers, you can instead include it at the top-center of every page.
Edges and margins
Your thesis must have even outer margins that are 1 inch (2.5 cm) from all edges of the paper. Your inner margins should be half an inch (1 cm). The page size should be 8.5 x 11 inches (21.6 x 27.9 cm).
What to keep in mind while binding a thesis?
A thesis is a collection of pages – regardless if it is bound or not. It can be done in different ways depending on how the binding looks like. There are three main types of binding:
- PUR (perfect) binding,
- Spiral Binding, and
- Coil Binding.
Pur Binding
PUR (perfect) binding is the most present type of binding for graduate students, it offers a very professional look to your thesis paper. It is also the least expensive way of binding your thesis.
The paper used in this process comes with two-three holes punched on the left side and has an adhesive strip across the entire length of the spine. In this case, you will have to remove the strip from the paper when you print your Thesis.
Once printed, punch an additional hole in each sheet for a total of six holes and cover it with a piece of stiff cardboard to prevent damage to the pages.
Insert one staple into each sheet, making sure that the staples are secure. This should be done on the left side of your pages (the same area where you removed the adhesive strip).
PUR binding is very strong because it uses a special glue to bind the sheets together; this type of binding makes it difficult for leaves to come out when turning them over.
Spiral Binding
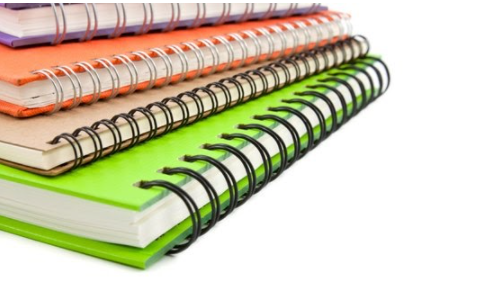
Spiral Binding is the most commonly used for course-related books and manuals. This type of binding can be done on a machine (Kluge) or by hand (lecture format).
The paper used in this process comes with punched holes on the left side and has an adhesive strip across the entire length of the spine. In this case, you will have to remove the strip from the paper when you print your Thesis.
Once printed, punch additional holes in each sheet for a total of five holes and cover it with a piece of stiff cardboard to prevent damage to the pages. Insert one staple into each sheet, making sure that the staples are secure. This should be done on the left side of your pages (the same area where you removed the adhesive strip).
Turn over each sheet and insert it into a coil. This step requires special tools, so if you want to do it by yourself just take one of your coils and attach it to the right side. The last step is attaching plain backing paper.
Coil Binding
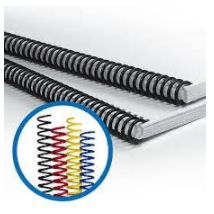
Coil Binding is the most economical type of binding and best suited for books with a lot of pages (more than 100). It can be done in different ways, depending on your preferences.
The paper used in this process comes with punched holes on the left side and has an adhesive strip across the entire length of the spine. In this case, you will have to remove the strip from the paper when you print your Thesis.
Once printed, punch additional holes in each sheet for a total of four holes (two on top and two on bottom).
Insert one staple into each sheet, making sure that the staples are secure. This should be done on the left side of your pages (the same area where you removed the adhesive strip).
Turn over each sheet and fold it to form a square, or if you prefer, use one of the following methods:
- For a three-hole pamphlet format: Fold all sheets in half so that they open on the right side and hold them together with one staple.
- For a four-hole pamphlet format: Fold all sheets in half so that they open on the right side and insert them into the coil.
- For a two-hole booklet format: Turn all sheets to their blank side and staple through the top center of your leaves using three staples (two at the top and one at the bottom). Turn over each leaf and staple through the bottom center of your leaves.
If you are using punched paper, another method is to insert two staples on the left side, about 1/2 inches from the top and bottom. Then fold each sheet in half.
You can use this last staple as a guideline to bend your leaves at 90 degrees, and then insert them into the coil.
What binding to choose for your thesis depends on various factors? For example, if you are required to submit your dissertation in parts (for example, one chapter at a time), then it is better not to use hardcovers because they cannot bend easily.
If you are allowed to choose the type of binding, then you should keep in mind that it must be strong enough to support the weight of your paper. You may choose between three main types of binding:
- Two hardcover boards, with two exposed spine edges
- Three exposed spine edges (often called “French binding”)
- One exposed and one concealed edge (called “Smythe sewn”) .
(By the way, some students use only one exposed edge for their binding. This is not recommended because your thesis will lose its strength.)
If you are allowed to choose the type of cover paper, then it should be 100% cotton or linen, or at least have a similar appearance. You may choose between white and off-white colors (if you are allowed to use colored paper, then you should choose a light color). As for the design of your cover, it must not include any illustrations because it will be covered by transparent plastic after binding.
The final step in preparing your thesis for defense is covering it with transparent plastic.
Some students choose to do these themselves while others prefer to give this job to a professional bookbinder. The main advantage of doing it yourself is that you can make sure that your manuscript will not fall apart during its presentation (such as when passing it to the defense committee). The main advantage of giving this job to a professional is that they can make sure that each page is safely covered (so you do not need to double-check their work like you would have to do if you were doing it yourself).
The type of plastic that you should use depends on the number of pages in your dissertation. If you have less than 100 pages, then thinner plastic sheets are recommended. If you have more than 100 pages, then you should use thicker plastic to prevent them from sticking together. You may also attach protective covers made of stiff cardboard (the same color as the cover) that will protect the first and last pages of your dissertation.
You have now learned how to print and bind your thesis. Go ahead and enjoy your graduation day!


0 responses on "A Complete Guide to Printing and Binding a Thesis"